Understanding the Subfloor: The Foundation of Your Floor:
Before diving into the prep process, it's essential to understand the role of the subfloor. It's the structural layer that acts as the base for your finished flooring. It's responsible for supporting the weight of foot traffic, furniture, and other everyday wear and tear. Just like a strong foundation is crucial for a sturdy building, a well-prepared subfloor creates a stable and level platform for your flooring materials. This translates to a smooth, even surface that not only looks good but also performs well over time.
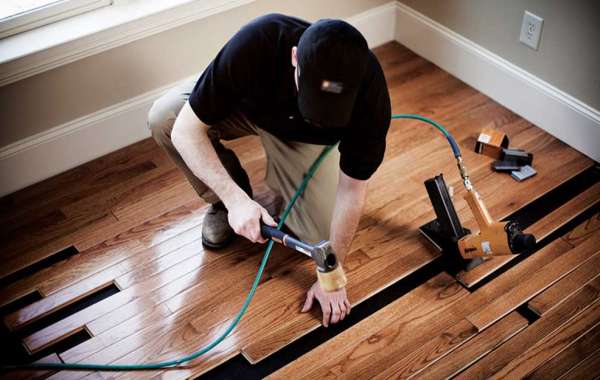
Installing the Flooring: Putting It All Together:
With the subfloor properly prepped and primed, it's time to proceed with the flooring installation itself. Whether you're laying hardwood, laminate, tile, or carpet, following manufacturer guidelines and best practices is essential for a successful installation. Remember to acclimate the flooring materials to the environment before installation and use the appropriate adhesives, fasteners, or installation methods specific to the chosen flooring type.
Assessing the Subfloor's Health: A Checkup Before Installation:
Before any prep work begins, it's vital to assess the condition of your existing subfloor. Look for signs of trouble, such as cracks, uneven surfaces, or evidence of moisture issues. Addressing these problems upfront prevents them from becoming bigger issues down the line and potentially compromising the integrity of your new flooring.
Combating the Enemy: Moisture Mitigation:
Moisture is a major threat to the durability and longevity of any flooring material. Before installation commences, it's crucial to conduct moisture tests to determine if your subfloor is prone to moisture problems. If high moisture levels are detected, proactive measures like installing a vapor barrier or moisture barrier become essential to mitigate the risk of damage to your new flooring.
Leveling Up: Creating a Smooth, Even Canvas:
A level subfloor is paramount for achieving a seamless and uniform flooring surface. Depending on the condition of your subfloor, leveling may involve filling in low spots, grinding down high areas, or utilizing self-leveling compounds to create a smooth, even plane. Taking the time to properly level the subfloor prevents issues like uneven flooring and premature wear and tear on your new investment.
Cleaning Up the Act: Preparing the Subfloor for Installation:
Before installing your new flooring, a thorough cleaning of the subfloor is essential. This removes any debris, dust, or contaminants that could affect the adhesion of adhesives or underlayment materials. Sweep or vacuum the subfloor to remove loose particles, followed by a damp cloth or mop to wipe away any remaining residue.
Priming for Success: Enhancing Adhesion and Performance:
Priming the subfloor is an often-missed step that can significantly improve the adhesion of adhesives and underlayment materials. A high-quality primer creates a bond-enhancing surface that helps prevent moisture migration and optimizes the overall performance of your flooring system.
Choosing the Right Underlayment: The Supporting Cast:
The underlayment acts as a crucial component of the flooring system, providing additional support, insulation, and soundproofing. Choosing the right underlayment for your specific flooring type and subfloor conditions is essential for achieving optimal results. Options range from basic foam underlayments to specialized products designed for moisture mitigation or sound reduction.
The Final Inspection: Ensuring a Flawless Finish:
Once the flooring installation is complete, it's vital to conduct a thorough inspection to ensure everything is in order. Check for any visible defects, gaps, or uneven areas that may require attention. Addressing issues promptly prevents them from worsening over time and guarantees the longevity of your new flooring.
Final Thoughts:
Subfloor preparation is the cornerstone upon which successful flooring installations are built. By taking the time to assess the subfloor condition, address moisture issues, level surfaces, and properly clean and prime the subfloor, you're laying the groundwork for a flawless finish and maximizing the lifespan of your flooring investment. Remember, investing in quality subfloor prep upfront translates to a beautiful, durable, and long-lasting floor that you can enjoy for years to come.